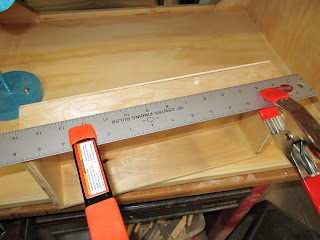
The method we use for installing a stack of drawers in frameless cabinets assumes the following:
- Drawer fronts will indent into opening
- The spacing around the drawer front edge and cabinet wall will be 1/8"
- The drawer slides will be side mounted
- The top and bottom drawer will have a 1/4" clearance with the drawer opening cabinet edge
- The spacing between drawers will be 3/8"
- The drawer front height will be 1/4" larger than nominal drawer vertical size,i.e., a 1/8" lip
 |
| 5 Drawer cabinet on wheels using full extension slides. |
The first step is to determine cabinet slide positions for the drawer set. For example, the drawers shown above are: 2", 3", 3", 4" and 5". With the drawer slides mounted centered on the drawer sides, the following arithmatic will determine the slide positions:
- 2" drawer: 1/4 + 1 = 1 1/4", 1/4" for top spacing + 1" for 1/2 the drawer height.
- 3" drawer: 1 1/4 + 1 + 3/8 + 1 1/2 = 4 1/8", (2" drawer position) 1 1/4 + (remain drawer width) 1 + (drawer spacing) 3/8 + (1/2 3" drawer height) 1 1/2
- 3" drawer: 4 1/8 + 1 1/2 + 3/8 + 1 1/2 = 7 1/2"
- and so on.
Step 3: position slide on a line centered in the screw holes. Mark two or three hole positions and use a nail or center punch ( I like a 1/16" center punch McMaster #34155A11 ) to make a starter hole for the screw, then screw slide in place.
 |
| Mounting cabinet full extension slides. |
Step 4: Mounting slide to drawer side. At either end of the drawer make a mark at 1/2 the drawer height and then draw the line.
 |
| Marking slide position on drawer. |
 |
| Drawing slide position line. |
 |
| Screwing slide to drawer. |
Step 5: Position slide on drawer with slide end aligned to drawer front as shown. Make starter holes and screw slide in position. Repeat for other drawer side.
Step 6: Insert the drawer into the cabient slides. When you push the drawer into position the first time you will encounter some resistance, since the bearings are repositioning themselves. Once the drawer is inplace this resistance should not occur. A couple of drops of DuPont Silicone lubricant on each slide before insertion will work wonders.
Making the Drawer Fronts:
The following method works for both full extension and Euro slides.
Step 1: From 1/2 (12 mm) plywood cut the front 1/4" smaller than the horizontal opening and 1/4" larger than the nominal drawer height.
Step 2: With a 1/8"R round over bit dress the front edge of the drawer front. After filling any voids in the edge sand and seal the drawer front both sides. Then coat with polyurethane.
 |
| Drawer front marked for handle. |
Step 3: Find vertical and horizontal of the drawer front and mark with pencil. Using center punch, mark position of handle holes. Then drill holes using a 3/16" brad pointed or dowel bit to prevent tearing around hole.
 |
| Front drilled for handle. |
Step 4: Clamp the drawer front to front part of the drawer. Use 1/8" spacers at bottom edge and center the front. Use a mini clamp to hold front in place will handle holes are drilled through. Insert handle screws from inside draw and fastened handle. If it was a wide drawer, 3/16" holes would be drilled through the front of the drawer at each end, then 3/4" #8 screws would be used to hold the drawer front in place. After that, drill and mount the handle.
 |
| Squeeze clamp holding drawer front in place with 1/8" spacer at bottom edge. |
:
 |
| Front positioned and ready to be drilled. |
 |
| Finished drawer front. |
Step 4: The method used above will not work for the top draw, so I use two small pieces of carpet tape on the front of the drawer. A spacer is used to space the drawer fronts. Set the drawer front at an angle on the spacer then tip the front forward until the tape is contacted. Clamp and drill handle holes.
No comments:
Post a Comment